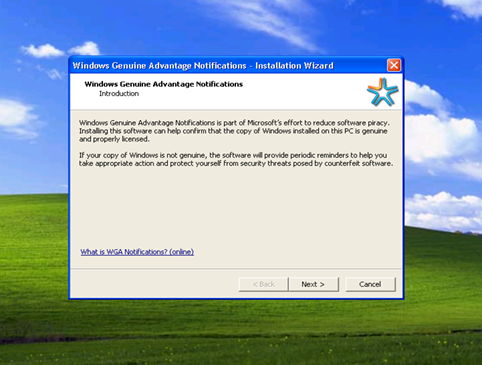
 A new version of Windows Genuine Advantage (WGA) Validation Tool has been released since March 26, 2009 in order to check and verify that a Windows system is licensed and paid for before allowing it to download updates from official Microsoft servers. The WGA Validation version 1.9.0040.0 or 1.9.40.0 appears to be the latest effort by Microsoft to fight counterfeit of still popular Windows XP operating system.
The new version 1.9.40.0 of WGA ActiveX controls can be downloaded via updated WGA Notifications KB905474 setup installer, WindowsXP-KB905474-ENU-x86.exe.
User who fails the WGA validation test and cannot download updates or applications from Microsoft Download Center and Windows Update or Microsoft Update can download and apply the WGA component patch so that the system will be treated as authenticated, genuine and legally purchased software when validation is performed.
Download WGA Crack v1.9.40.0 (by Supremo Phantom): WGA_v19400.rar
Download WGA Crack v1.9.40.0 (by Deep Space 9): Windows.Genuine.Advantage.Validation.v1.9.0040.0.CRACKED-DS9.rar Windows.Genuine.Advantage.Validation.v1.9.0040.0.CRACKED.REPACK-DS9.rar
Supremo Phantom version of WGA crack is a standalone executable, while DS9 continues to use the batch script to apply the patch as with previous versions of WGA cracks.
After applying the WGA patch, any Windows system, regardless of authenticity, can access and download from Windows Update, Microsoft Update and Microsoft Download Center. There won’t be any notification nag screen or message that pops up too. WGA applies to Windows XP and Windows Vista, and likely Windows 7 in future too. Although WGA does not specifically target Windows 2000, Windows Server 2003 or the Windows 9x family, some downloads and non-critical updates from the Download Center for these operating system do require validation.
[Tutorial] Windows XP pirate dah minta Genuine ?? Jgn Pening Kepala
[Tutorial] Shortcut dalam windows XP only
General keyboard shortcuts
* CTRL+C (Copy)
* CTRL+X (Cut)
* CTRL+V (Paste)
* CTRL+Z (Undo)
* DELETE (Delete)
* SHIFT+DELETE (Delete the selected item permanently without placing the item in the Recycle Bin)
* CTRL while dragging an item (Copy the selected item)
* CTRL+SHIFT while dragging an item (Create a shortcut to the selected item)
* F2 key (Rename the selected item)
* CTRL+RIGHT ARROW (Move the insertion point to the beginning of the next word)
* CTRL+LEFT ARROW (Move the insertion point to the beginning of the previous word)
* CTRL+DOWN ARROW (Move the insertion point to the beginning of the next paragraph)
* CTRL+UP ARROW (Move the insertion point to the beginning of the previous paragraph)
* CTRL+SHIFT with any of the arrow keys (Highlight a block of text)
* SHIFT with any of the arrow keys (Select more than one item in a window or on the desktop, or select text in a document)
* CTRL+A (Select all)
* F3 key (Search for a file or a folder)
* ALT+ENTER (View the properties for the selected item)
* ALT+F4 (Close the active item, or quit the active program)
* ALT+ENTER (Display the properties of the selected object)
* ALT+SPACEBAR (Open the shortcut menu for the active window)
* CTRL+F4 (Close the active document in programs that enable you to have multiple documents open simultaneously)
* ALT+TAB (Switch between the open items)
* ALT+ESC (Cycle through items in the order that they had been opened)
* F6 key (Cycle through the screen elements in a window or on the desktop)
* F4 key (Display the Address bar list in My Computer or Windows Explorer)
* SHIFT+F10 (Display the shortcut menu for the selected item)
* ALT+SPACEBAR (Display the System menu for the active window)
* CTRL+ESC (Display the Start menu)
* ALT+Underlined letter in a menu name (Display the corresponding menu)
* Underlined letter in a command name on an open menu (Perform the corresponding command)
* F10 key (Activate the menu bar in the active program)
* RIGHT ARROW (Open the next menu to the right, or open a submenu)
* LEFT ARROW (Open the next menu to the left, or close a submenu)
* F5 key (Update the active window)
* BACKSPACE (View the folder one level up in My Computer or Windows Explorer)
* ESC (Cancel the current task)
* SHIFT when you insert a CD-ROM into the CD-ROM drive (Prevent the CD-ROM from automatically playing)
* CTRL+SHIFT+ESC (Open Task Manager)
Dialog box keyboard shortcuts
If you press SHIFT+F8 in extended selection list boxes, you enable extended selection mode. In this mode, you can use an arrow key to move a cursor without changing the selection. You can press CTRL+SPACEBAR or SHIFT+SPACEBAR to adjust the selection. To cancel extended selection mode, press SHIFT+F8 again. Extended selection mode cancels itself when you move the focus to another control.
* CTRL+TAB (Move forward through the tabs)
* CTRL+SHIFT+TAB (Move backward through the tabs)
* TAB (Move forward through the options)
* SHIFT+TAB (Move backward through the options)
* ALT+Underlined letter (Perform the corresponding command or select the corresponding option)
* ENTER (Perform the command for the active option or button)
* SPACEBAR (Select or clear the check box if the active option is a check box)
* Arrow keys (Select a button if the active option is a group of option buttons)
* F1 key (Display Help)
* F4 key (Display the items in the active list)
* BACKSPACE (Open a folder one level up if a folder is selected in the Save As or Open dialog box)
Microsoft natural keyboard shortcuts
* Windows Logo (Display or hide the Start menu)
* Windows Logo+BREAK (Display the System Properties dialog box)
* Windows Logo+D (Display the desktop)
* Windows Logo+M (Minimize all of the windows)
* Windows Logo+SHIFT+M (Restore the minimized windows)
* Windows Logo+E (Open My Computer)
* Windows Logo+F (Search for a file or a folder)
* CTRL+Windows Logo+F (Search for computers)
* Windows Logo+F1 (Display Windows Help)
* Windows Logo+ L (Lock the keyboard)
* Windows Logo+R (Open the Run dialog box)
* Windows Logo+U (Open Utility Manager)
Accessibility keyboard shortcuts
* Right SHIFT for eight seconds (Switch FilterKeys either on or off)
* Left ALT+left SHIFT+PRINT SCREEN (Switch High Contrast either on or off)
* Left ALT+left SHIFT+NUM LOCK (Switch the MouseKeys either on or off)
* SHIFT five times (Switch the StickyKeys either on or off)
* NUM LOCK for five seconds (Switch the ToggleKeys either on or off)
* Windows Logo +U (Open Utility Manager)
Windows Explorer keyboard shortcuts
* END (Display the bottom of the active window)
* HOME (Display the top of the active window)
* NUM LOCK+Asterisk sign (*) (Display all of the subfolders that are under the selected folder)
* NUM LOCK+Plus sign (+) (Display the contents of the selected folder)
* NUM LOCK+Minus sign (-) (Collapse the selected folder)
* LEFT ARROW (Collapse the current selection if it is expanded, or select the parent folder)
* RIGHT ARROW (Display the current selection if it is collapsed, or select the first subfolder)
Shortcut keys for Character Map
After you double-click a character on the grid of characters, you can move through the grid by using the keyboard shortcuts:
* RIGHT ARROW (Move to the right or to the beginning of the next line)
* LEFT ARROW (Move to the left or to the end of the previous line)
* UP ARROW (Move up one row)
* DOWN ARROW (Move down one row)
* PAGE UP (Move up one screen at a time)
* PAGE DOWN (Move down one screen at a time)
* HOME (Move to the beginning of the line)
* END (Move to the end of the line)
* CTRL+HOME (Move to the first character)
* CTRL+END (Move to the last character)
* SPACEBAR (Switch between Enlarged and Normal mode when a character is selected)
Microsoft Management Console (MMC) main window keyboard shortcuts
* CTRL+O (Open a saved console)
* CTRL+N (Open a new console)
* CTRL+S (Save the open console)
* CTRL+M (Add or remove a console item)
* CTRL+W (Open a new window)
* F5 key (Update the content of all console windows)
* ALT+SPACEBAR (Display the MMC window menu)
* ALT+F4 (Close the console)
* ALT+A (Display the Action menu)
* ALT+V (Display the View menu)
* ALT+F (Display the File menu)
* ALT+O (Display the Favorites menu)
MMC console window keyboard shortcuts
* CTRL+P (Print the current page or active pane)
* ALT+Minus sign (-) (Display the window menu for the active console window)
* SHIFT+F10 (Display the Action shortcut menu for the selected item)
* F1 key (Open the Help topic, if any, for the selected item)
* F5 key (Update the content of all console windows)
* CTRL+F10 (Maximize the active console window)
* CTRL+F5 (Restore the active console window)
* ALT+ENTER (Display the Properties dialog box, if any, for the selected item)
* F2 key (Rename the selected item)
* CTRL+F4 (Close the active console window. When a console has only one console window, this shortcut closes the console)
Remote desktop connection navigation
* CTRL+ALT+END (Open the Microsoft Windows NT Security dialog box)
* ALT+PAGE UP (Switch between programs from left to right)
* ALT+PAGE DOWN (Switch between programs from right to left)
* ALT+INSERT (Cycle through the programs in most recently used order)
* ALT+HOME (Display the Start menu)
* CTRL+ALT+BREAK (Switch the client computer between a window and a full screen)
* ALT+DELETE (Display the Windows menu)
* CTRL+ALT+Minus sign (-) (Place a snapshot of the entire client window area on the Terminal server clipboard and provide the same functionality as pressing ALT+PRINT SCREEN on a local computer.)
* CTRL+ALT+Plus sign (+) (Place a snapshot of the active window in the client on the Terminal server clipboard and provide the same functionality as pressing PRINT SCREEN on a local computer.)
Microsoft Internet Explorer navigation
* CTRL+B (Open the Organize Favorites dialog box)
* CTRL+E (Open the Search bar)
* CTRL+F (Start the Find utility)
* CTRL+H (Open the History bar)
* CTRL+I (Open the Favorites bar)
* CTRL+L (Open the Open dialog box)
* CTRL+N (Start another instance of the browser with the same Web address)
* CTRL+O (Open the Open dialog box, the same as CTRL+L)
* CTRL+P (Open the Print dialog box)
* CTRL+R (Update the current Web page)
* CTRL+W (Close the current window)
[Tutorial] Shortcut dalam windows
Windows system key combinations
* F1: Help
* CTRL+ESC: Open Start menu
* ALT+TAB: Switch between open programs
* ALT+F4: Quit program
* SHIFT+DELETE: Delete item permanently
* Windows Logo+L: Lock the computer (without using CTRL+ALT+DELETE)
Windows program key combinations
* CTRL+C: Copy
* CTRL+X: Cut
* CTRL+V: Paste
* CTRL+Z: Undo
* CTRL+B: Bold
* CTRL+U: Underline
* CTRL+I: Italic
Mouse click/keyboard modifier combinations for shell objects
* SHIFT+right click: Displays a shortcut menu containing alternative commands
* SHIFT+double click: Runs the alternate default command (the second item on the menu)
* ALT+double click: Displays properties
* SHIFT+DELETE: Deletes an item immediately without placing it in the Recycle Bin
General keyboard-only commands
* F1: Starts Windows Help
* F10: Activates menu bar options
* SHIFT+F10 Opens a shortcut menu for the selected item (this is the same as right-clicking an object
* CTRL+ESC: Opens the Start menu (use the ARROW keys to select an item)
* CTRL+ESC or ESC: Selects the Start button (press TAB to select the taskbar, or press SHIFT+F10 for a context menu)
* CTRL+SHIFT+ESC: Opens Windows Task Manager
* ALT+DOWN ARROW: Opens a drop-down list box
* ALT+TAB: Switch to another running program (hold down the ALT key and then press the TAB key to view the task-switching window)
* SHIFT: Press and hold down the SHIFT key while you insert a CD-ROM to bypass the automatic-run feature
* ALT+SPACE: Displays the main window's System menu (from the System menu, you can restore, move, resize, minimize, maximize, or close the window)
* ALT+- (ALT+hyphen): Displays the Multiple Document Interface (MDI) child window's System menu (from the MDI child window's System menu, you can restore, move, resize, minimize, maximize, or close the child window)
* CTRL+TAB: Switch to the next child window of a Multiple Document Interface (MDI) program
* ALT+underlined letter in menu: Opens the menu
* ALT+F4: Closes the current window
* CTRL+F4: Closes the current Multiple Document Interface (MDI) window
* ALT+F6: Switch between multiple windows in the same program (for example, when the Notepad Find dialog box is displayed, ALT+F6 switches between the Find dialog box and the main Notepad window)
Shell objects and general folder/Windows Explorer shortcuts
For a selected object:
* F2: Rename object
* F3: Find all files
* CTRL+X: Cut
* CTRL+C: Copy
* CTRL+V: Paste
* SHIFT+DELETE: Delete selection immediately, without moving the item to the Recycle Bin
* ALT+ENTER: Open the properties for the selected object
[Tutorial] Membina Blog Sendiri Di Blogger
Assalamualaikun,
Saya ingin berkongsi sedikit sebanyak tentang pengetahuan yang ada pada saya kepada semua pengguna Internet yang masih buntu untuk membina Blog mereka sendiri.

1. Sila taip http://www.blogger.com di web address anda dan paparan ini akan kelihatan (bawah)

2. Sila tekan pada butang yang berwarna oren (Create a blog). Paparan akan kelihatan seperti berikut (bawah)


3. Sila Masukkan seperti yang dipinta
- Email yang sedang anda gunakan
- Password hendaklah melebihi 8
- Display name anda harus memasukkan nama yang anda ingin paparkan sebagai author
- Last sekali masukkan perkataan yang diberikan (elakkan spam)
- Akhir sekali tekan butang CONTINUE

4. Disini pula anda harus memasukkan nama blog yang anda inginkan dan tajuk utama blog anda. Setelah selesai sila tekan butang CONTINUE.


6. Post pertama anda telah siap sepenuhnya. Sila tekan VIEW POST untuk ke muka hadapan blog anda.

Inspirasi kepada peminat Photographi
Applied carefully, High Dynamic Range-technique (HDR) can create incredibly beautiful pictures which blur our sense of the difference between reality and illusion. In graphics HDR imaging is a set of techniques that allow a far greater dynamic range of exposures than normal digital imaging techniques. The intention is to accurately represent the wide range of intensity levels found in real scenes, ranging from direct sunlight to the deepest shadows. This is usually achieved by modifying photos with image processing software for tone-mapping. And the results can be really incredible; in fact, many artists and designers come up with some pretty fancy results.
This post covers 35 extremely beautiful and perfectly executed HDR-pictures. Some of them might look surreal, too colorful, even magic or fake, but they are not — keep in mind that they’ve all been developed out of usual photos, and not a single image is an illustration.
Please notice:
- the selection isn’t supposed to be complete which is why we encourage you to post links to further excellent HDR images in the comments to this post;
- there is no ranking, all pictures have been selected due to their outstanding quality and excellent execution;
- you can explore further works of the designers and photographers we’ve featured below by browsing through their sets on Flickr;
- all screenshots are clickable and lead to the pages from which they’ve been taken;
- you might want to take a look at the article (Really) Stunning Desktop Wallpapers we’ve published earlier.
Fantastic HDR Pictures


 Read More......
Eksiden di KB Mall
Macam²..Kejadian berlaku pada hari ni (06/12/09) Jam 4.45 ptg di mana sebuah kereta tersalah reverse lalu merempuh bangunan di area parking tersebut dan terjatuh dari tingkat 3 ke area escalator tingkat bawah berhadapan dgn Levi’s store dan Watson.
Berita selanjutnya berita TV3 malam ni.


Nak salahkan sape? pembuat bangunan?
TIPS PC (Pasang/Format/Install/Servis)
Format Machine
sebelum format sesuatu machine kene pastikan semua software dan driver lengkap... tak boleh nak pakai format terus.... pasti kan sebelum format masuk dulu DEVICE MANAGER untuk pastikan driver driver yang berkenaan.. contohnya driver vga jenis ape..... sound jenis ape... lepas tuh baru boleh format..... Nie le sedikit sebanyak step untuk orang yang baru nak belajar format machine nih... kang kalo semua dah lengkap aku ingat nak buat satu topic sticky kot...
1. Check driver machine... VGA, SOUND, etc
2. Sediakan CD software.... Operation System(OS) , etc (cth: MsOffice, Winamp, Mp3, Driver)
3. Hardware yang sihat sihat belaka......
Cara nak format:
1. Masukkan CD OS... pastikan jenis driver telah dikenalpasti, dan pastikan juga CD itu BOOTABLE.
Sebelum masukkan cd restart machine masuk dalam bios... lepas tuh setkan 1st boot CDROM 2nd boot HD.
(andaikan anda tak gunakan startup disk floppy) Save setup & exit. Restart.
2. Ikut arahan yang ada dalam CD tuh.... Start Computer with CD support kot (lupa die tulis apa)
3. Tetapkan saiz partition dan format partition sama ada FAT atau NTFS
4. Format partition yang telah dibuat... restart kembali.. dan seterusnya ikut arahan CD tersebut....
(cth: masukkan no serial OS)
5. Selepas siap install OS install lah pulak vga, sound, network card, printer, etc.
;;;;;;;;;;;;;;;;;;;;;;;;;;;;;;;;;;;;;;;;;;;;;;;;;;;;;;;;;;;;;;;;;;;;;;;;;;;;;;;;;;;;;
Servis RAM
Gunakan pemadam pensil atau pen kemudian tonyohkan pemadam tersebut pada plat tembaga RAM anda..... buat dengan berhati-hati..... apabila anda lihat tembaga tersebut kekuning-kuningan bermakna RAM anda telah siap di servis.
;;;;;;;;;;;;;;;;;;;;;;;;;;;;;;;;;;;;;;;;;;;;;;;;;;;;;;;;;;;;;;;;;;;;;;;;;;;;;;;;;;;;;
Buang File
Kalau anda ni jenis pemalas nak bersihkan recycle bin anda tips nih paling sesuai untuk anda. Masa nak del sesuatu file dalam machine anda tuh pilih folder yang nak del.... kemudian tekan kekunci Shift + Del. Senang kan?
;;;;;;;;;;;;;;;;;;;;;;;;;;;;;;;;;;;;;;;;;;;;;;;;;;;;;;;;;;;;;;;;;;;;;;;;;;;;;;;;;;;;;
Pilih Windows
Ini pulak bagi mereka yang tak suka gunakan mouse macam saya nih.... Cara nya tekan Alt + Tab. Pilihla aplikasi mana yang anda mahukan
;;;;;;;;;;;;;;;;;;;;;;;;;;;;;;;;;;;;;;;;;;;;;;;;;;;;;;;;;;;;;;;;;;;;;;;;;;;;;;;;;;;;
Memasang pemacu keras
Biasanya, pemacu keras adalah peranti storan utama PC. Apabila anda memasang sesebuah sistem operasi (OS) atau aplikasi, ia disimpan pada pemacu keras. Julat kapasiti pemacu keras biasanya di antara 10GB sehingga 120GB untuk sebuah PC standard. Pemacu keras yang digunakan dalam contoh ini ialah pemacu IDE Seagate 20GB. Pasang pemacu ini pada kedudukan 憄rimary master� menggunakan kabel riben IDE.
1. Gunakan 慾umper� sedia ada, konfigurasi pemacu untuk menjadi 揗aster� pada satu saluran IDE.
2. Hubungkan kabel riben IDE pada papan induk dan pastikan orientasi Pin 1 adalah tepat (Pin 1 bertanda jalur merah pada kabel riben dan nombor 1 pada penghubung 憄rimary master� pada papan induk).
3. Pasangkan pemacu keras tadi pada kabel riben IDE pada kedudukan 憁aster� (pada bahagian hujung kabel riben IDE). Kemudian, pastikan agar kabel riben IDE tadi dipalamkan pada Pin 1 pada pemacu keras (Pin 1 pada pemacu keras adalah yang menghadap atau bersemuka dengan penyambung kuasa).
4. Letakkan pemacu keras tersebut ke dalam pelantar 揌D 1� pada 慶asing� komputer dan 慽kat� pemacu berkenaan dengan menggunakan skru pengikat pemacu yang berjumlah empat butir kesemuanya.
Memasang CD-ROM
CD-ROM (Compact Disk-Read Only Memory) pula digunakan untuk memindahkan data atau aplikasi ke dalam PC anda. Data pada CD-ROM dibaca oleh laser - tidak seperti pemacu keras yang menggunakan kepala pembaca/menulis (read/write). Kapasiti CD-ROM juga cukup besar, namun kebanyakannya boleh menyimpan 700MB sehingga 800MB data. Hanya CDR/RW boleh diformatkan untuk ditulis menggunakan pemacu CD-RW. Dalam contoh ini pemacu CD-ROM Sony 48x akan dipasang sebagai 憇econdary master�.
1. Gunakan 慾umper� yang disediakan untuk mengkonfigurasi pemacu menjadi 慚aster� pada satu saluran IDE. Ketetapan untuk 慾umper� tersebut ada dinyatakan pada pemacu itu sendiri.
2. Hubungkan kabel riben IDE pada papan induk dan pastikan Pin 1 berada pada kedudukan betul (Pin 1 ditandai jalur merah pada riben kabel dan angka 1 pada penghubung 憇econdary master� papan induk).
3. Pasangkan pemacu CD-ROM tadi pada kabel riben IDE pada kedudukan 憁aster� (di hujung kabel riben IDE). Pastikan bahawa kabel riben IDE ditempatkan pada Pin 1 pada pemacu CD-ROM (Pin 1 pada pemacu CD-ROM adalah berhadapan atau bersemuka dengan penghubung kuasa).
4. Pasangkan kabel audio untuk CD-ROM. Tempatkan pemacu CD-ROM tadi ke dalam pelantar 25� di bahagian atas 慶asing� komputer anda dan 慽kat� pemacu tersebut menggunakan 4 unit skru pemacu.
Mamasang pemacu disket
Pemacu disket menyimpan maklumat seperti pemacu keras yang menggunakan kepala pembaca/menulis (read/write). Pemacu disket hanya menyimpan sejumlah kecil data berbanding apa yang mampu disimpan pada CDR/RW dan pemacu keras. Disket standard memiliki kapasiti data 1.44MB (berbanding 700MB pada CD-ROM standard). Bagaimanapun, pemacu disket telah teruji dari masa ke semasa dan sehingga hari ini, ia masih dianggap sebagai komponen standard PC. Dengan lain perkataan, peranti ini masih digunakan.
1. Kenal pasti kabel riben pemacu disket IDE (kabel ini berpintal pada satu hujungnya) dan sisipkannya kepada penghubung pemacu disket yang terdapat pada papan induk. Pastikan hujungnya yang berpintal itu rapat dengan pemacu disket dan Pin 1 berada pada kedudukan betul (sama seperti pemacu keras).
2. Seterusnya, hubungkan pemacu disket tadi ke hujung kabel riben IDE dan pastikan Pin 1 berada pada kedudukan yang betul. Anda boleh berpandukan kepada jalur merah yang terdapat pada kabel tersebut.
Sumber: http://www.karangkraf.com.my/E-Majalah/MajalahPC/
Hukum Onani Dalam Islam

PENGENALAN
Memikirkan sejenak masalah sosial yang menimpa remaja masa kini, saya termenung berpanjangan. Saya juga turut tergolong di dalam golongan remaja. Inilah realiti dunia kita. Antara permasalah yang seringkali ditimbulkan oleh pelbagai pihak samada daripada golongan muda remaja hinggalah dewasa berkeluarga adalah berkenaan masalah onani. Saya juga tidak terlepas daripada pertanyaan ini terutamanya melalui perantaraan maya Yahoo Massenger.
Permasalahan ini amatlah membimbangkan. Ia bagaikan satu kebiasaan dan lumrah umat pada masa kini terutamanya bagi golongan remaja. Ada di antara mereka ketagih dengan onani ini dengan sebab mulanya hanyalah perasaan ingin mencuba untuk mencari sesuatu yang baru. Ada pula yang ketagih kerana telah diajar oleh pasangan kekasih mereka ketika hangat bercinta dahulu. Ada juga yang lebih teruk lagi daripada itu ketagih setelah agak biasa melakukan persetubuhan haram berulang-ulang kali dengan kekasih hati. Jadi mereka semua ini secara umumnya tidak dapat meninggalkan perbuatan onani dan seringkali melakukannya apabila ada masa terluang.
Di sini saya cuba membincangkan beberapa perkara yang berkaitan dengan onani ini. Tujuan penulisan ini bukanlah untuk menjatuhkan maruah sesiapa pun akan tetapi perbincangan ini adalah sebagai satu usaha dakwah saya untuk memberi faham kepada masyarakat mengenai permasalahan onani ini. Semoga perbincangan ringkas ini akan memberikan hasil yang lumayan kepada kita semua, insyaAllah.
PENGERTIAN ONANI
Onani (melancap) dalam Bahasa Arab disebut Istimna. Dalam ertikata mudanya bermaksud mengeluarkan sperma atau mani secara sendirian bukan dengan jalan yang dibenarkan oleh syarak. Ia merupakan satu istilah untuk menyatakan kegiatan yang dilakukan oleh seseorang itu dalam memenuhi syahwatnya dengan menggunakan tangan sendiri ataupun dengan bantuan alat-alat tertentu sehingga mengeluarkan mani.
HUKUM ONANI
Pandangan daripada Mazhab Maliki dan Mazhab Shafie: Mengatakan haram onani secara mutlak.
Dalilnya sepertimana firman Allah Taala bermaksud: Dan orang-orang yang menjaga kemaluannya. Kecuali terhadap isteri-isteri mereka atau budak yang mereka miliki (hamba) maka sesungguhnya mereka dalam hal ini tiada tercela. Barangsiapa mencari yang di bilik itu (berzina) maka mereka itulah orang-orang yang melampaui batas. (Surah al-Mukminun: ayat 5 hingga 7).
Pandangan daripada Mazhab Hanafi: Mengatakan haram pada sesetengah keadaan dan wajib pada sesetengah keadaan. Mereka berkata: Wajib onani jika takut terjatuh dalam zina. Menggunakan kaedah qawaid fiqhiyah: Yang terlebih ringan daripada dua mudharat. Mereka berkata lagi: Tidak mengapa onani apabila bergelora syahwat dan tiada di sisinya isteri atau hamba.
Pandangan dari Mazhab Hanbali:Mengatakan haram onani. Melainkan boleh beronani jika takut diri berzina atau memudharatkan kesihatan ketika isteri atau hamba tiada di sisi dan tidak mampu untuk berkahwin. Mereka berkata: Mani adalah benda lebih daripada tubuh manusia. Maka boleh dibuangkannya dengan beberapa syarat-syarat tertentu.
Kesimpulan:
Daripada perbincangan dan perbahasan ulama-ulama mazhab di atas maka saya lebih cenderung untuk memilih pendapat yang mengatakan haram beronani (pendapat dari Mazhab Maliki dan Shafie) sama ada kepada lelaki ataupun perempuan. Ini disabitkan dengan dalil seperti yang telah dinyatakan di atas.
Pendapat saya ini juga disokong oleh pensyarah hadis kami iaitu Prof. Dr. Mahir Mansor Abdul Razak seperti yang terkandung di dalam kitabnya bertanjuk al-Syaz al-Fayah Min Ahadis al-Nikah.
SEKADAR PERINGATAN
Di sini saya bawakan juga beberapa hadis untuk peringatan dan renungan kita bersama dalam menghadapi persoalan onani ini. Sabda Rasulullah S.A.W. yang bermaksud: Wahai sekalian pemuda yang mampu untuk mengeluarkan mahar maka kahwinlah. Maka sesungguhnya perkahwinan itu akan memejamkan pandangan dan menjaga kemaluan. Dan sesiapa yang tidak mampu (untuk berkahwin) maka berpuasalah. Maka sesungguhnya (puasa) adalah perisai. (Riwayat al-Bukhari, Muslim, Abu Daud, al-Tarmizi, al-Nasaie, Ibnu Majah, al-Darimi, Ahmad)
Sabda Rasulullah S.A.W. yang bermaksud: Apabila seorang hamba Allah beristeri maka dia telah melengkapi sebahagian daripada agamanya. Oleh itu, dia hendaklah bertakwa kepada Allah untuk menyempurnakan sebahagian lagi. (Riwayat al-Baihaqi).
Sabda Rasulullah S.A.W. yang bermaksud: Ada tujuh golongan manusia yang Allah tidak akan melihat mereka pada hari kiamat dan tidak membersihkan mereka daripada dosa bahkan Allah berfirman kepada mereka: Masuklah kamu ke dalam neraka bersama orang-orang yang dimasukkan ke dalamnya.
Tujuh golongan tersebut ialah:
1. Orang yang melakukan homoseks.
2. Orang yang melakukan kahwin tangan (onani).
3. Orang yang melakukan hubungan seks dengan binatang.
4. Orang yang melakukan hubungan seks melalui dubur (liwat).
5. Orang yang berkahwin antara ibu dan anak.
6. Orang yang berzina dengan isteri jirannya.
7. Orang yang menggangu jirannya.
(Riwayat al-Tabrani).
CARA-CARA MENGHINDARI KETAGIHAN ONANI
Di antara cara-cara untuk menyekat dan menghindarkan diri daripada terus terjebak di dalam kancah ketagihan onani adalah:
1. Sentiasa mendekatkan diri kepada Allah Taala.
2. Jika mampu dan tiada halangan maka berkahwinlah segera.
3. Sentiasa menyibukkan diri dengan aktiviti dan program luar.
4. Sentiasa menjaga pandangan mata dari perkara-perkara maksiat.
5. Berkawan dengan kawan-kawan yang mampu membawa kebaikkan.
6. Sentiasa mendampingi dan meminta tunjuk ajar dari orang alim.
7. Sentiasa mempelajari ilmu agama secara ikhlas dan bersungguh-sungguh.
8. Berpuasa