1. BlogDesk
- Aku baru try install dan configure. Blom try post, edit, dll..
- Tak support Blogger.com
- Platform 'Tingkap's sahaja. Support Vistas.
- Size < 4Mb
- Support Wordpress, Drupal, dll.
- http://www.blogdesk.org/en/index.htm
2. Zoundry Raven
- Lesen GPL v2
- Baru nak test. Aku suke mende2 Open Source ni. Heheh...
- Support byk platform.
- Boleh install sebagai Portable Apps Yeah!! ![]()
- Auto detect kita punya blog platform lepas kita masukkan link blog kita(Masa nak add account)
- Lepas create account, dia akan download sume post, link, image, tag yang kita buat ke dalam pc kita. Buat local copy. (aku try kat blog berasaskan wordpress)
- Masa nak loading lambat skit sbb nak load plugin
- Saiz < 11Mb
- Platform 'Tingkap's sahaja.. Support Vistas...
- http://www.zoundryraven.com/index.html
Setakat ni 2 software tu reliable jugak la kan. Tapi aku lebih suka Zoundry Raven.
Just for Kaki Blog
Solat Time
Nak berkongsi software yang amat berguna.
Salaat Time adalah software yang menunjukkan dan mengingatkan kita waktu solat.
Bila masuk waktu solat, azan dari software ini akan berkumandang.
Software percuma ini dibangunkan oleh SalaatTime.com
Selain daripada mengingatkan kita waktu solat, perisian ini juga menunjukkan arah kiblat,
menukar tarikh masihi to hijrah dan terdapat ayat suci al-Quran.
Software ini tidak memberatkan pc.
Semoga kita memanfaatkannya.
terasa macam diperli ja bila azan software ni berkumandang tp masih dok mengadap pc lagi.hehe
http://www.salaattime.com/
[Tutorial] Make Logo Using Photoshop
This tutorial will explain you the easiest way how to make glossy web 2.0 stylish logo for a blog. Simple web image designing technique using Photoshop. I use Photoshop CS2 on this example. As we know that now a days web 2.0 stylish design can be found a lot on the net. So now we'll try to remake our blog to be web 2.0 using cool glossy logo for your blog name. The final result should be like this.
 1.Open up new Photoshop document. You can easily do this by hitting Ctrl+N on your keyboard. Set it up like this one below. Just a note, I use 400x400px document just to make us easier in working with this Photoshop.
 2. Using text tool, now type your blog name. A word for your blog logo. Set your text font as illustrated below. I use Calibri 48px Bold as my text font. To make it more web 2.0 stylish, you have to use some simple fonts. Suggestion; Calibri, Tahoma, Trebuchet MS, and Segoe UI are working fine.
 3. We have to rasterize our text layer. We can do this by clicking Layer menu than Rasterize Type.
 4. Before we move up around, we need to set Foreground and Background color at first. Now set it to #ffb60e for Foreground and #ffce00 for background color. We need to do this step for our text gradient at next.
 5. Now we'll give some effects to our text layer. Bring Blending option dialogue up by right clicking on the text layer and choose Blending option. Or we can do this by clicking Layer menu, than Layer Style, now choose Blending option. Check drop shadow option and set its attributes like below illustration.
 6. We'll also give it outer glow effect. Just set it like illustration below.
 7. Now it is time to add one of glossy element. Give our text layer gradient effect by checking Gradient overlay tab. Don't forget to use Foreground to Background overlay. See illustration below.
 8. Last effect to add should be Stroke effect. Set stroke size to 5px and set its color to #e58100. Now just press OK button to confirm it.
 9. From this step your blog logo should be a bit like this one. It is web 2.0 enough but we'll redesign it to be more stylish. Yes, by giving it a glossy effect.
 10. We can make such glossy effect in very simple easy way. Now create a new layer by hitting Ctrl+Shift+N on your keyboard press than OK or just Enter. Now make creative selection using Lasso tool. Use your bright creative brain, just an improvization like this one. I'm not so good on this step, so use your own.
 11. Oke you are good. Next step is more simple step. Fill this selection with white (#ffffff) color. Do this by clicking Edit menu than Fill. Or simply hit Shift+F5 buttons. After you do this right now set this layer opacity to 35%.
 12. Wow.. our logo now is a web 2.0 logo. And of course we can use it for our blog. If you did it right your logo should be like my logo below. I know you are good in making this logo design. We're done!!
Conclusion
From many steps above we know that making a web 2.0 logo for a blog is not so hard to do. You can improve your creativity in using style, colors, and blending option settings. I know you can do better than me. So if you feel this tutorial is good and you've made a logo from this tutorial, feel free to post it here. Just comment this tutorial. Below is my other final result from this tutorial, just added some glass shadow.

LockThis – kuncikan windows, lindungi privasi
- Versi terkini : 1.1.0
- Bahasa perisian : English
- Size perisian : 528 KB
- Download link : http://duriosoft.info/downloads/lt-setup.exe


Percutian Di Petaling Jaya
Hye Kekawan,
Saya berada di Petaling Jaya sekarang. Saya mengikuti keluarga disini. Maaf la kalau saya tak dapat online community. Saya disini menatap di Hotel Crown Hotel. Hotel nie agak kedekut la. WIFI pun nak kena bayar. hm..
Tapi yang saya agak seronok ialah saya dapat memandu kerendaan ke sini. Dari rumah sampai PP jer..Maklum la saya takde Lesen Memandu yang sah lagi.. He3
[Tutorial] Windows XP pirate dah minta Genuine ?? Jgn Pening Kepala
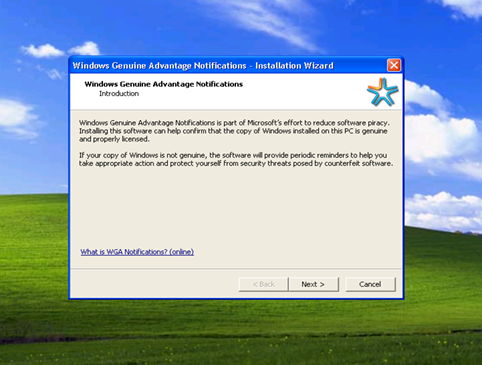 A new version of Windows Genuine Advantage (WGA) Validation Tool has been released since March 26, 2009 in order to check and verify that a Windows system is licensed and paid for before allowing it to download updates from official Microsoft servers. The WGA Validation version 1.9.0040.0 or 1.9.40.0 appears to be the latest effort by Microsoft to fight counterfeit of still popular Windows XP operating system.
The new version 1.9.40.0 of WGA ActiveX controls can be downloaded via updated WGA Notifications KB905474 setup installer, WindowsXP-KB905474-ENU-x86.exe.
User who fails the WGA validation test and cannot download updates or applications from Microsoft Download Center and Windows Update or Microsoft Update can download and apply the WGA component patch so that the system will be treated as authenticated, genuine and legally purchased software when validation is performed.
Download WGA Crack v1.9.40.0 (by Supremo Phantom): WGA_v19400.rar
Download WGA Crack v1.9.40.0 (by Deep Space 9): Windows.Genuine.Advantage.Validation.v1.9.0040.0.CRACKED-DS9.rar Windows.Genuine.Advantage.Validation.v1.9.0040.0.CRACKED.REPACK-DS9.rar
Supremo Phantom version of WGA crack is a standalone executable, while DS9 continues to use the batch script to apply the patch as with previous versions of WGA cracks.
After applying the WGA patch, any Windows system, regardless of authenticity, can access and download from Windows Update, Microsoft Update and Microsoft Download Center. There won’t be any notification nag screen or message that pops up too. WGA applies to Windows XP and Windows Vista, and likely Windows 7 in future too. Although WGA does not specifically target Windows 2000, Windows Server 2003 or the Windows 9x family, some downloads and non-critical updates from the Download Center for these operating system do require validation.
[Tutorial] Shortcut dalam windows XP only
General keyboard shortcuts
* CTRL+C (Copy)
* CTRL+X (Cut)
* CTRL+V (Paste)
* CTRL+Z (Undo)
* DELETE (Delete)
* SHIFT+DELETE (Delete the selected item permanently without placing the item in the Recycle Bin)
* CTRL while dragging an item (Copy the selected item)
* CTRL+SHIFT while dragging an item (Create a shortcut to the selected item)
* F2 key (Rename the selected item)
* CTRL+RIGHT ARROW (Move the insertion point to the beginning of the next word)
* CTRL+LEFT ARROW (Move the insertion point to the beginning of the previous word)
* CTRL+DOWN ARROW (Move the insertion point to the beginning of the next paragraph)
* CTRL+UP ARROW (Move the insertion point to the beginning of the previous paragraph)
* CTRL+SHIFT with any of the arrow keys (Highlight a block of text)
* SHIFT with any of the arrow keys (Select more than one item in a window or on the desktop, or select text in a document)
* CTRL+A (Select all)
* F3 key (Search for a file or a folder)
* ALT+ENTER (View the properties for the selected item)
* ALT+F4 (Close the active item, or quit the active program)
* ALT+ENTER (Display the properties of the selected object)
* ALT+SPACEBAR (Open the shortcut menu for the active window)
* CTRL+F4 (Close the active document in programs that enable you to have multiple documents open simultaneously)
* ALT+TAB (Switch between the open items)
* ALT+ESC (Cycle through items in the order that they had been opened)
* F6 key (Cycle through the screen elements in a window or on the desktop)
* F4 key (Display the Address bar list in My Computer or Windows Explorer)
* SHIFT+F10 (Display the shortcut menu for the selected item)
* ALT+SPACEBAR (Display the System menu for the active window)
* CTRL+ESC (Display the Start menu)
* ALT+Underlined letter in a menu name (Display the corresponding menu)
* Underlined letter in a command name on an open menu (Perform the corresponding command)
* F10 key (Activate the menu bar in the active program)
* RIGHT ARROW (Open the next menu to the right, or open a submenu)
* LEFT ARROW (Open the next menu to the left, or close a submenu)
* F5 key (Update the active window)
* BACKSPACE (View the folder one level up in My Computer or Windows Explorer)
* ESC (Cancel the current task)
* SHIFT when you insert a CD-ROM into the CD-ROM drive (Prevent the CD-ROM from automatically playing)
* CTRL+SHIFT+ESC (Open Task Manager)
Dialog box keyboard shortcuts
If you press SHIFT+F8 in extended selection list boxes, you enable extended selection mode. In this mode, you can use an arrow key to move a cursor without changing the selection. You can press CTRL+SPACEBAR or SHIFT+SPACEBAR to adjust the selection. To cancel extended selection mode, press SHIFT+F8 again. Extended selection mode cancels itself when you move the focus to another control.
* CTRL+TAB (Move forward through the tabs)
* CTRL+SHIFT+TAB (Move backward through the tabs)
* TAB (Move forward through the options)
* SHIFT+TAB (Move backward through the options)
* ALT+Underlined letter (Perform the corresponding command or select the corresponding option)
* ENTER (Perform the command for the active option or button)
* SPACEBAR (Select or clear the check box if the active option is a check box)
* Arrow keys (Select a button if the active option is a group of option buttons)
* F1 key (Display Help)
* F4 key (Display the items in the active list)
* BACKSPACE (Open a folder one level up if a folder is selected in the Save As or Open dialog box)
Microsoft natural keyboard shortcuts
* Windows Logo (Display or hide the Start menu)
* Windows Logo+BREAK (Display the System Properties dialog box)
* Windows Logo+D (Display the desktop)
* Windows Logo+M (Minimize all of the windows)
* Windows Logo+SHIFT+M (Restore the minimized windows)
* Windows Logo+E (Open My Computer)
* Windows Logo+F (Search for a file or a folder)
* CTRL+Windows Logo+F (Search for computers)
* Windows Logo+F1 (Display Windows Help)
* Windows Logo+ L (Lock the keyboard)
* Windows Logo+R (Open the Run dialog box)
* Windows Logo+U (Open Utility Manager)
Accessibility keyboard shortcuts
* Right SHIFT for eight seconds (Switch FilterKeys either on or off)
* Left ALT+left SHIFT+PRINT SCREEN (Switch High Contrast either on or off)
* Left ALT+left SHIFT+NUM LOCK (Switch the MouseKeys either on or off)
* SHIFT five times (Switch the StickyKeys either on or off)
* NUM LOCK for five seconds (Switch the ToggleKeys either on or off)
* Windows Logo +U (Open Utility Manager)
Windows Explorer keyboard shortcuts
* END (Display the bottom of the active window)
* HOME (Display the top of the active window)
* NUM LOCK+Asterisk sign (*) (Display all of the subfolders that are under the selected folder)
* NUM LOCK+Plus sign (+) (Display the contents of the selected folder)
* NUM LOCK+Minus sign (-) (Collapse the selected folder)
* LEFT ARROW (Collapse the current selection if it is expanded, or select the parent folder)
* RIGHT ARROW (Display the current selection if it is collapsed, or select the first subfolder)
Shortcut keys for Character Map
After you double-click a character on the grid of characters, you can move through the grid by using the keyboard shortcuts:
* RIGHT ARROW (Move to the right or to the beginning of the next line)
* LEFT ARROW (Move to the left or to the end of the previous line)
* UP ARROW (Move up one row)
* DOWN ARROW (Move down one row)
* PAGE UP (Move up one screen at a time)
* PAGE DOWN (Move down one screen at a time)
* HOME (Move to the beginning of the line)
* END (Move to the end of the line)
* CTRL+HOME (Move to the first character)
* CTRL+END (Move to the last character)
* SPACEBAR (Switch between Enlarged and Normal mode when a character is selected)
Microsoft Management Console (MMC) main window keyboard shortcuts
* CTRL+O (Open a saved console)
* CTRL+N (Open a new console)
* CTRL+S (Save the open console)
* CTRL+M (Add or remove a console item)
* CTRL+W (Open a new window)
* F5 key (Update the content of all console windows)
* ALT+SPACEBAR (Display the MMC window menu)
* ALT+F4 (Close the console)
* ALT+A (Display the Action menu)
* ALT+V (Display the View menu)
* ALT+F (Display the File menu)
* ALT+O (Display the Favorites menu)
MMC console window keyboard shortcuts
* CTRL+P (Print the current page or active pane)
* ALT+Minus sign (-) (Display the window menu for the active console window)
* SHIFT+F10 (Display the Action shortcut menu for the selected item)
* F1 key (Open the Help topic, if any, for the selected item)
* F5 key (Update the content of all console windows)
* CTRL+F10 (Maximize the active console window)
* CTRL+F5 (Restore the active console window)
* ALT+ENTER (Display the Properties dialog box, if any, for the selected item)
* F2 key (Rename the selected item)
* CTRL+F4 (Close the active console window. When a console has only one console window, this shortcut closes the console)
Remote desktop connection navigation
* CTRL+ALT+END (Open the Microsoft Windows NT Security dialog box)
* ALT+PAGE UP (Switch between programs from left to right)
* ALT+PAGE DOWN (Switch between programs from right to left)
* ALT+INSERT (Cycle through the programs in most recently used order)
* ALT+HOME (Display the Start menu)
* CTRL+ALT+BREAK (Switch the client computer between a window and a full screen)
* ALT+DELETE (Display the Windows menu)
* CTRL+ALT+Minus sign (-) (Place a snapshot of the entire client window area on the Terminal server clipboard and provide the same functionality as pressing ALT+PRINT SCREEN on a local computer.)
* CTRL+ALT+Plus sign (+) (Place a snapshot of the active window in the client on the Terminal server clipboard and provide the same functionality as pressing PRINT SCREEN on a local computer.)
Microsoft Internet Explorer navigation
* CTRL+B (Open the Organize Favorites dialog box)
* CTRL+E (Open the Search bar)
* CTRL+F (Start the Find utility)
* CTRL+H (Open the History bar)
* CTRL+I (Open the Favorites bar)
* CTRL+L (Open the Open dialog box)
* CTRL+N (Start another instance of the browser with the same Web address)
* CTRL+O (Open the Open dialog box, the same as CTRL+L)
* CTRL+P (Open the Print dialog box)
* CTRL+R (Update the current Web page)
* CTRL+W (Close the current window)
[Tutorial] Shortcut dalam windows
Windows system key combinations
* F1: Help
* CTRL+ESC: Open Start menu
* ALT+TAB: Switch between open programs
* ALT+F4: Quit program
* SHIFT+DELETE: Delete item permanently
* Windows Logo+L: Lock the computer (without using CTRL+ALT+DELETE)
Windows program key combinations
* CTRL+C: Copy
* CTRL+X: Cut
* CTRL+V: Paste
* CTRL+Z: Undo
* CTRL+B: Bold
* CTRL+U: Underline
* CTRL+I: Italic
Mouse click/keyboard modifier combinations for shell objects
* SHIFT+right click: Displays a shortcut menu containing alternative commands
* SHIFT+double click: Runs the alternate default command (the second item on the menu)
* ALT+double click: Displays properties
* SHIFT+DELETE: Deletes an item immediately without placing it in the Recycle Bin
General keyboard-only commands
* F1: Starts Windows Help
* F10: Activates menu bar options
* SHIFT+F10 Opens a shortcut menu for the selected item (this is the same as right-clicking an object
* CTRL+ESC: Opens the Start menu (use the ARROW keys to select an item)
* CTRL+ESC or ESC: Selects the Start button (press TAB to select the taskbar, or press SHIFT+F10 for a context menu)
* CTRL+SHIFT+ESC: Opens Windows Task Manager
* ALT+DOWN ARROW: Opens a drop-down list box
* ALT+TAB: Switch to another running program (hold down the ALT key and then press the TAB key to view the task-switching window)
* SHIFT: Press and hold down the SHIFT key while you insert a CD-ROM to bypass the automatic-run feature
* ALT+SPACE: Displays the main window's System menu (from the System menu, you can restore, move, resize, minimize, maximize, or close the window)
* ALT+- (ALT+hyphen): Displays the Multiple Document Interface (MDI) child window's System menu (from the MDI child window's System menu, you can restore, move, resize, minimize, maximize, or close the child window)
* CTRL+TAB: Switch to the next child window of a Multiple Document Interface (MDI) program
* ALT+underlined letter in menu: Opens the menu
* ALT+F4: Closes the current window
* CTRL+F4: Closes the current Multiple Document Interface (MDI) window
* ALT+F6: Switch between multiple windows in the same program (for example, when the Notepad Find dialog box is displayed, ALT+F6 switches between the Find dialog box and the main Notepad window)
Shell objects and general folder/Windows Explorer shortcuts
For a selected object:
* F2: Rename object
* F3: Find all files
* CTRL+X: Cut
* CTRL+C: Copy
* CTRL+V: Paste
* SHIFT+DELETE: Delete selection immediately, without moving the item to the Recycle Bin
* ALT+ENTER: Open the properties for the selected object
[Tutorial] Membina Blog Sendiri Di Blogger
Assalamualaikun,
Saya ingin berkongsi sedikit sebanyak tentang pengetahuan yang ada pada saya kepada semua pengguna Internet yang masih buntu untuk membina Blog mereka sendiri.

1. Sila taip http://www.blogger.com di web address anda dan paparan ini akan kelihatan (bawah)

2. Sila tekan pada butang yang berwarna oren (Create a blog). Paparan akan kelihatan seperti berikut (bawah)


3. Sila Masukkan seperti yang dipinta
- Email yang sedang anda gunakan
- Password hendaklah melebihi 8
- Display name anda harus memasukkan nama yang anda ingin paparkan sebagai author
- Last sekali masukkan perkataan yang diberikan (elakkan spam)
- Akhir sekali tekan butang CONTINUE

4. Disini pula anda harus memasukkan nama blog yang anda inginkan dan tajuk utama blog anda. Setelah selesai sila tekan butang CONTINUE.


6. Post pertama anda telah siap sepenuhnya. Sila tekan VIEW POST untuk ke muka hadapan blog anda.

Inspirasi kepada peminat Photographi
Applied carefully, High Dynamic Range-technique (HDR) can create incredibly beautiful pictures which blur our sense of the difference between reality and illusion. In graphics HDR imaging is a set of techniques that allow a far greater dynamic range of exposures than normal digital imaging techniques. The intention is to accurately represent the wide range of intensity levels found in real scenes, ranging from direct sunlight to the deepest shadows. This is usually achieved by modifying photos with image processing software for tone-mapping. And the results can be really incredible; in fact, many artists and designers come up with some pretty fancy results.
This post covers 35 extremely beautiful and perfectly executed HDR-pictures. Some of them might look surreal, too colorful, even magic or fake, but they are not — keep in mind that they’ve all been developed out of usual photos, and not a single image is an illustration.
Please notice:
- the selection isn’t supposed to be complete which is why we encourage you to post links to further excellent HDR images in the comments to this post;
- there is no ranking, all pictures have been selected due to their outstanding quality and excellent execution;
- you can explore further works of the designers and photographers we’ve featured below by browsing through their sets on Flickr;
- all screenshots are clickable and lead to the pages from which they’ve been taken;
- you might want to take a look at the article (Really) Stunning Desktop Wallpapers we’ve published earlier.
Fantastic HDR Pictures


 Read More......